Action & Workflows
This page highlights common actions you can perform in the Web Panel: generating API tokens, deploying updates from the UI, and managing multiple deployment keys.
Create and Manage API Tokens
API tokens are used to authenticate API calls from the CLI or CI/CD pipelines.
Create a token
- Navigate to Profile Icon -> Token List
- Click on Create Token
- Enter a descriptive name (e.g., “CI Pipeline Token”, “CLI Access”)
- Select Access Level:
- All – Full read and write access
- Write – Create and update deployments
- Read – View deployments and app information only
- Click Create Token – your token will be generated
- Copy the token immediately and store it securely (you won’t be able to see it again)
- Use this token with the CLI or API for authentication
Manage tokens
- View all tokens on the Tokens page
- Delete tokens you no longer need
- Create separate tokens for CI/CD, local development, or different team members
Use different tokens per environment (e.g., staging vs production) for better security and revocation control.
Deploy Updates
You can send DOTA updates directly from the Web Panel:
- Click Create Release
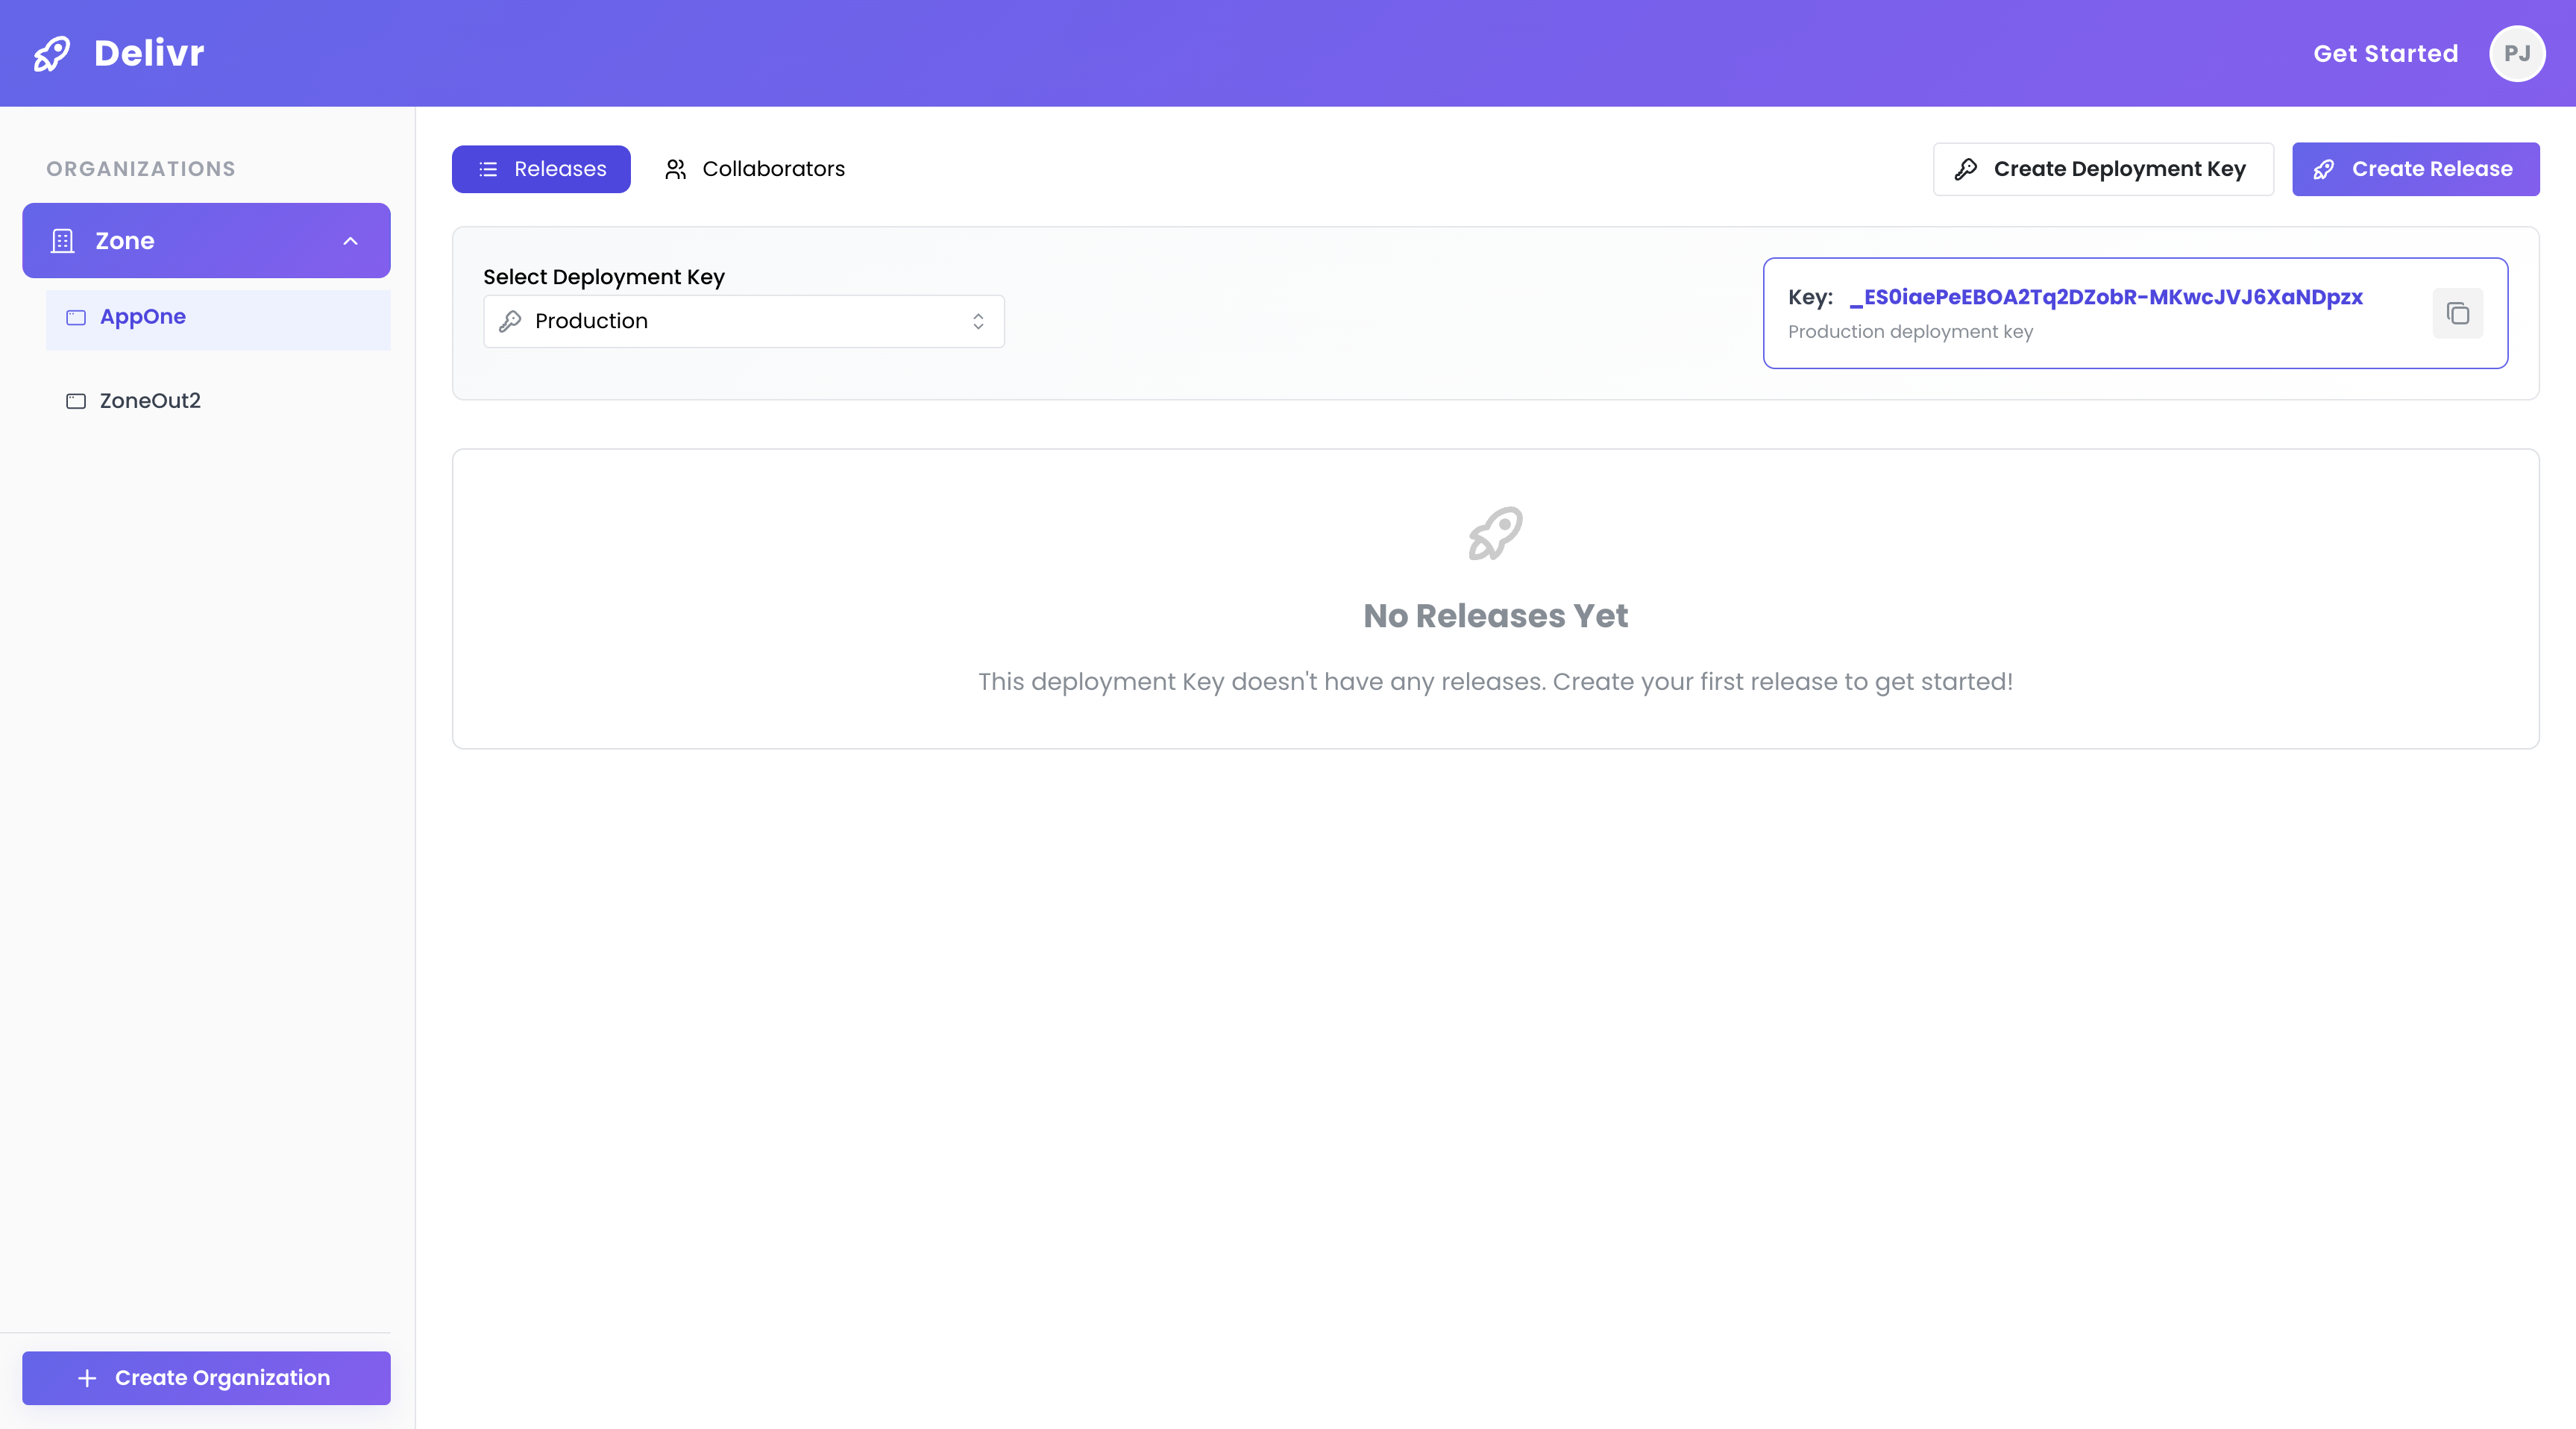
Create Release Button
- Upload your application bundle
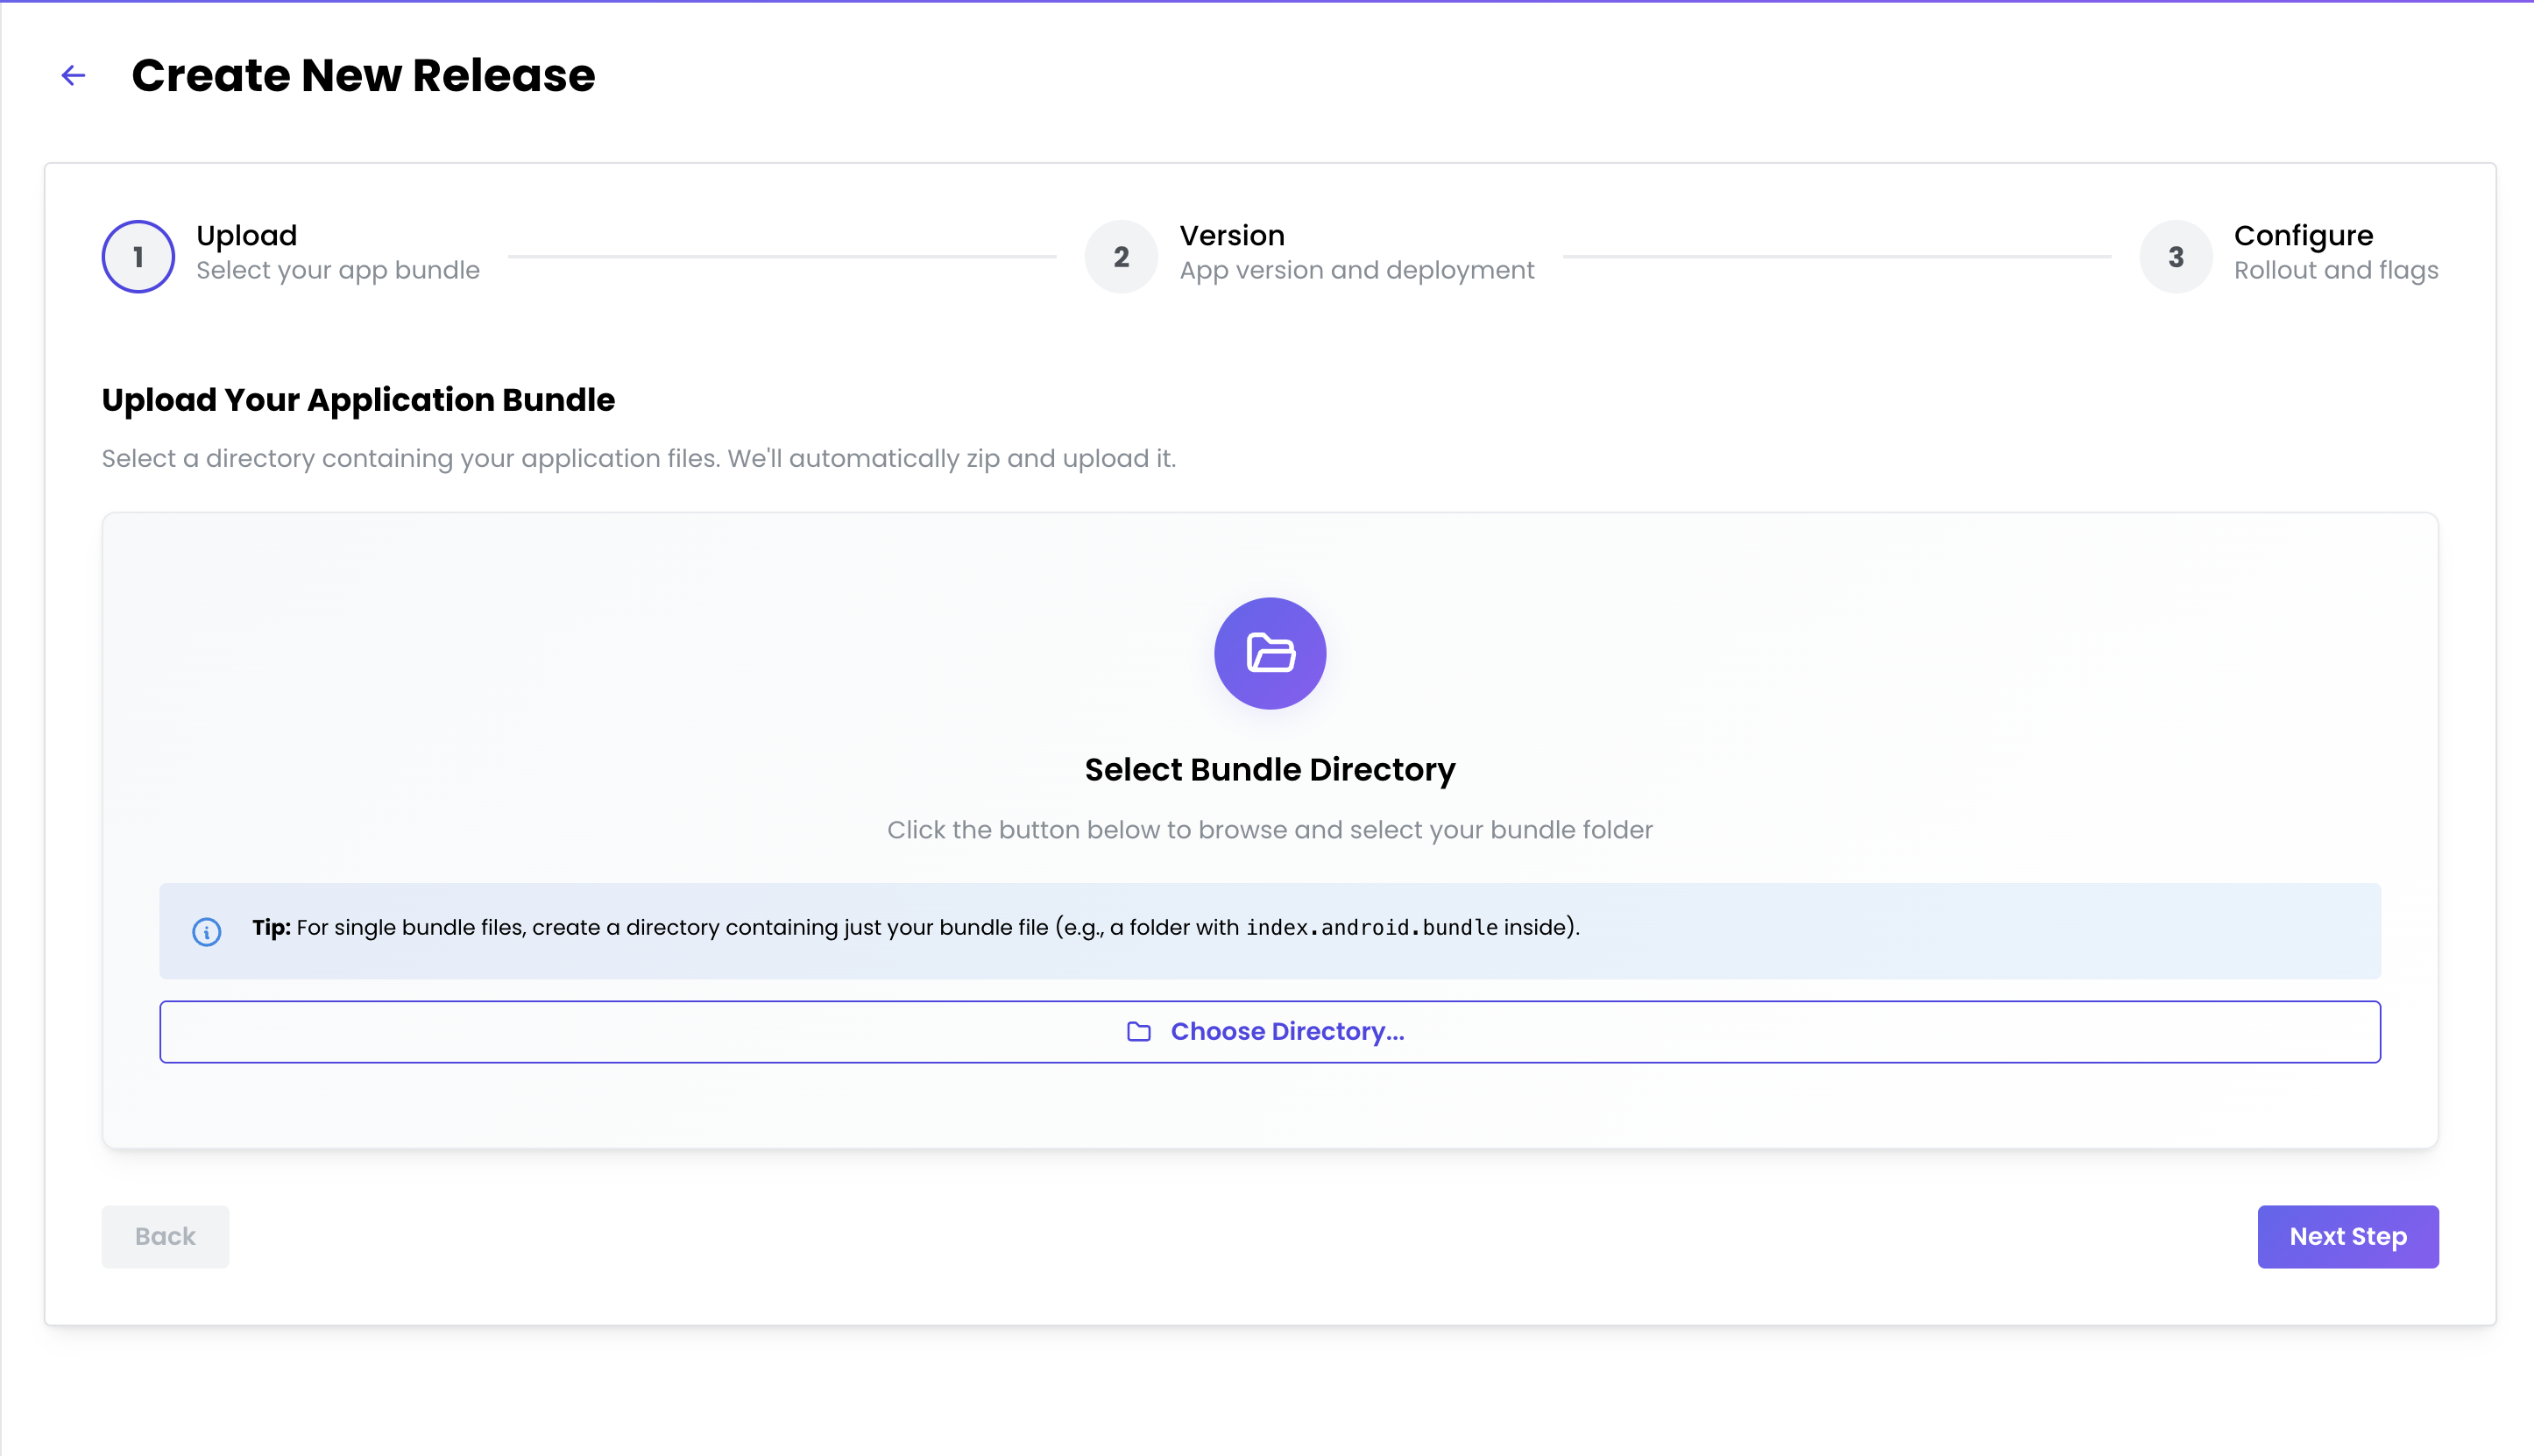
Upload Bundle
- App version and deployment details
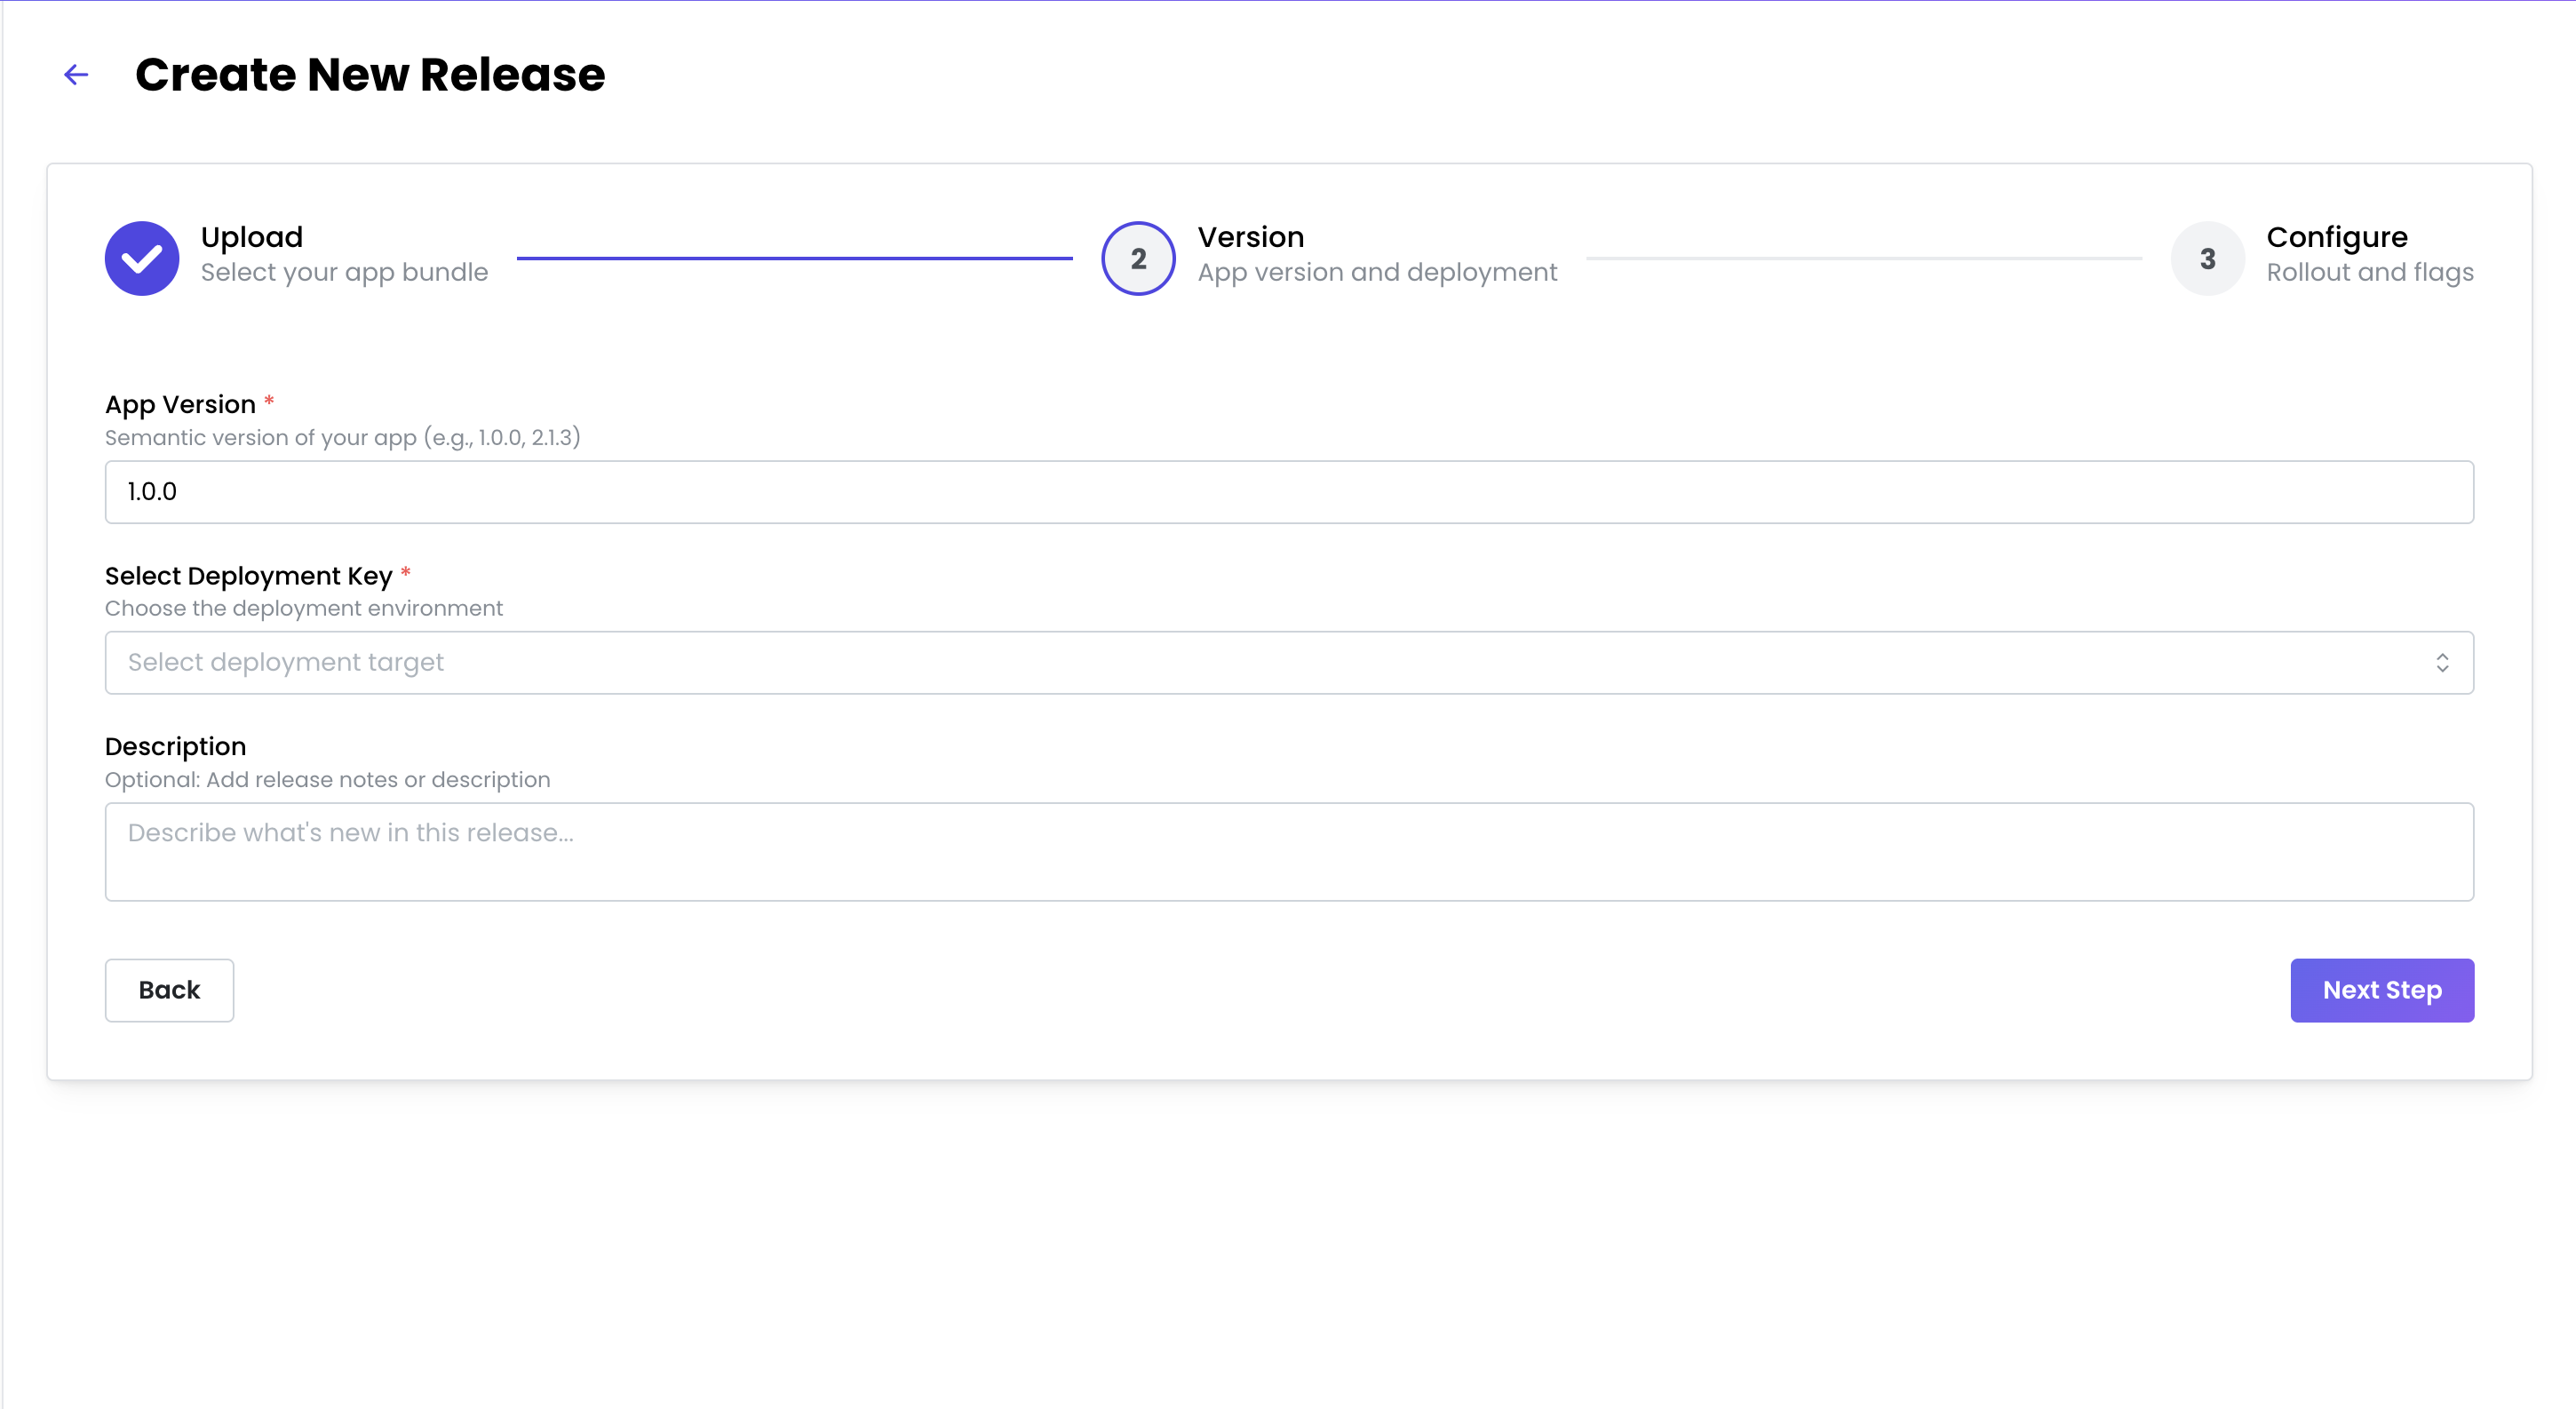
Version and Deployment
- Rollout and flags configuration
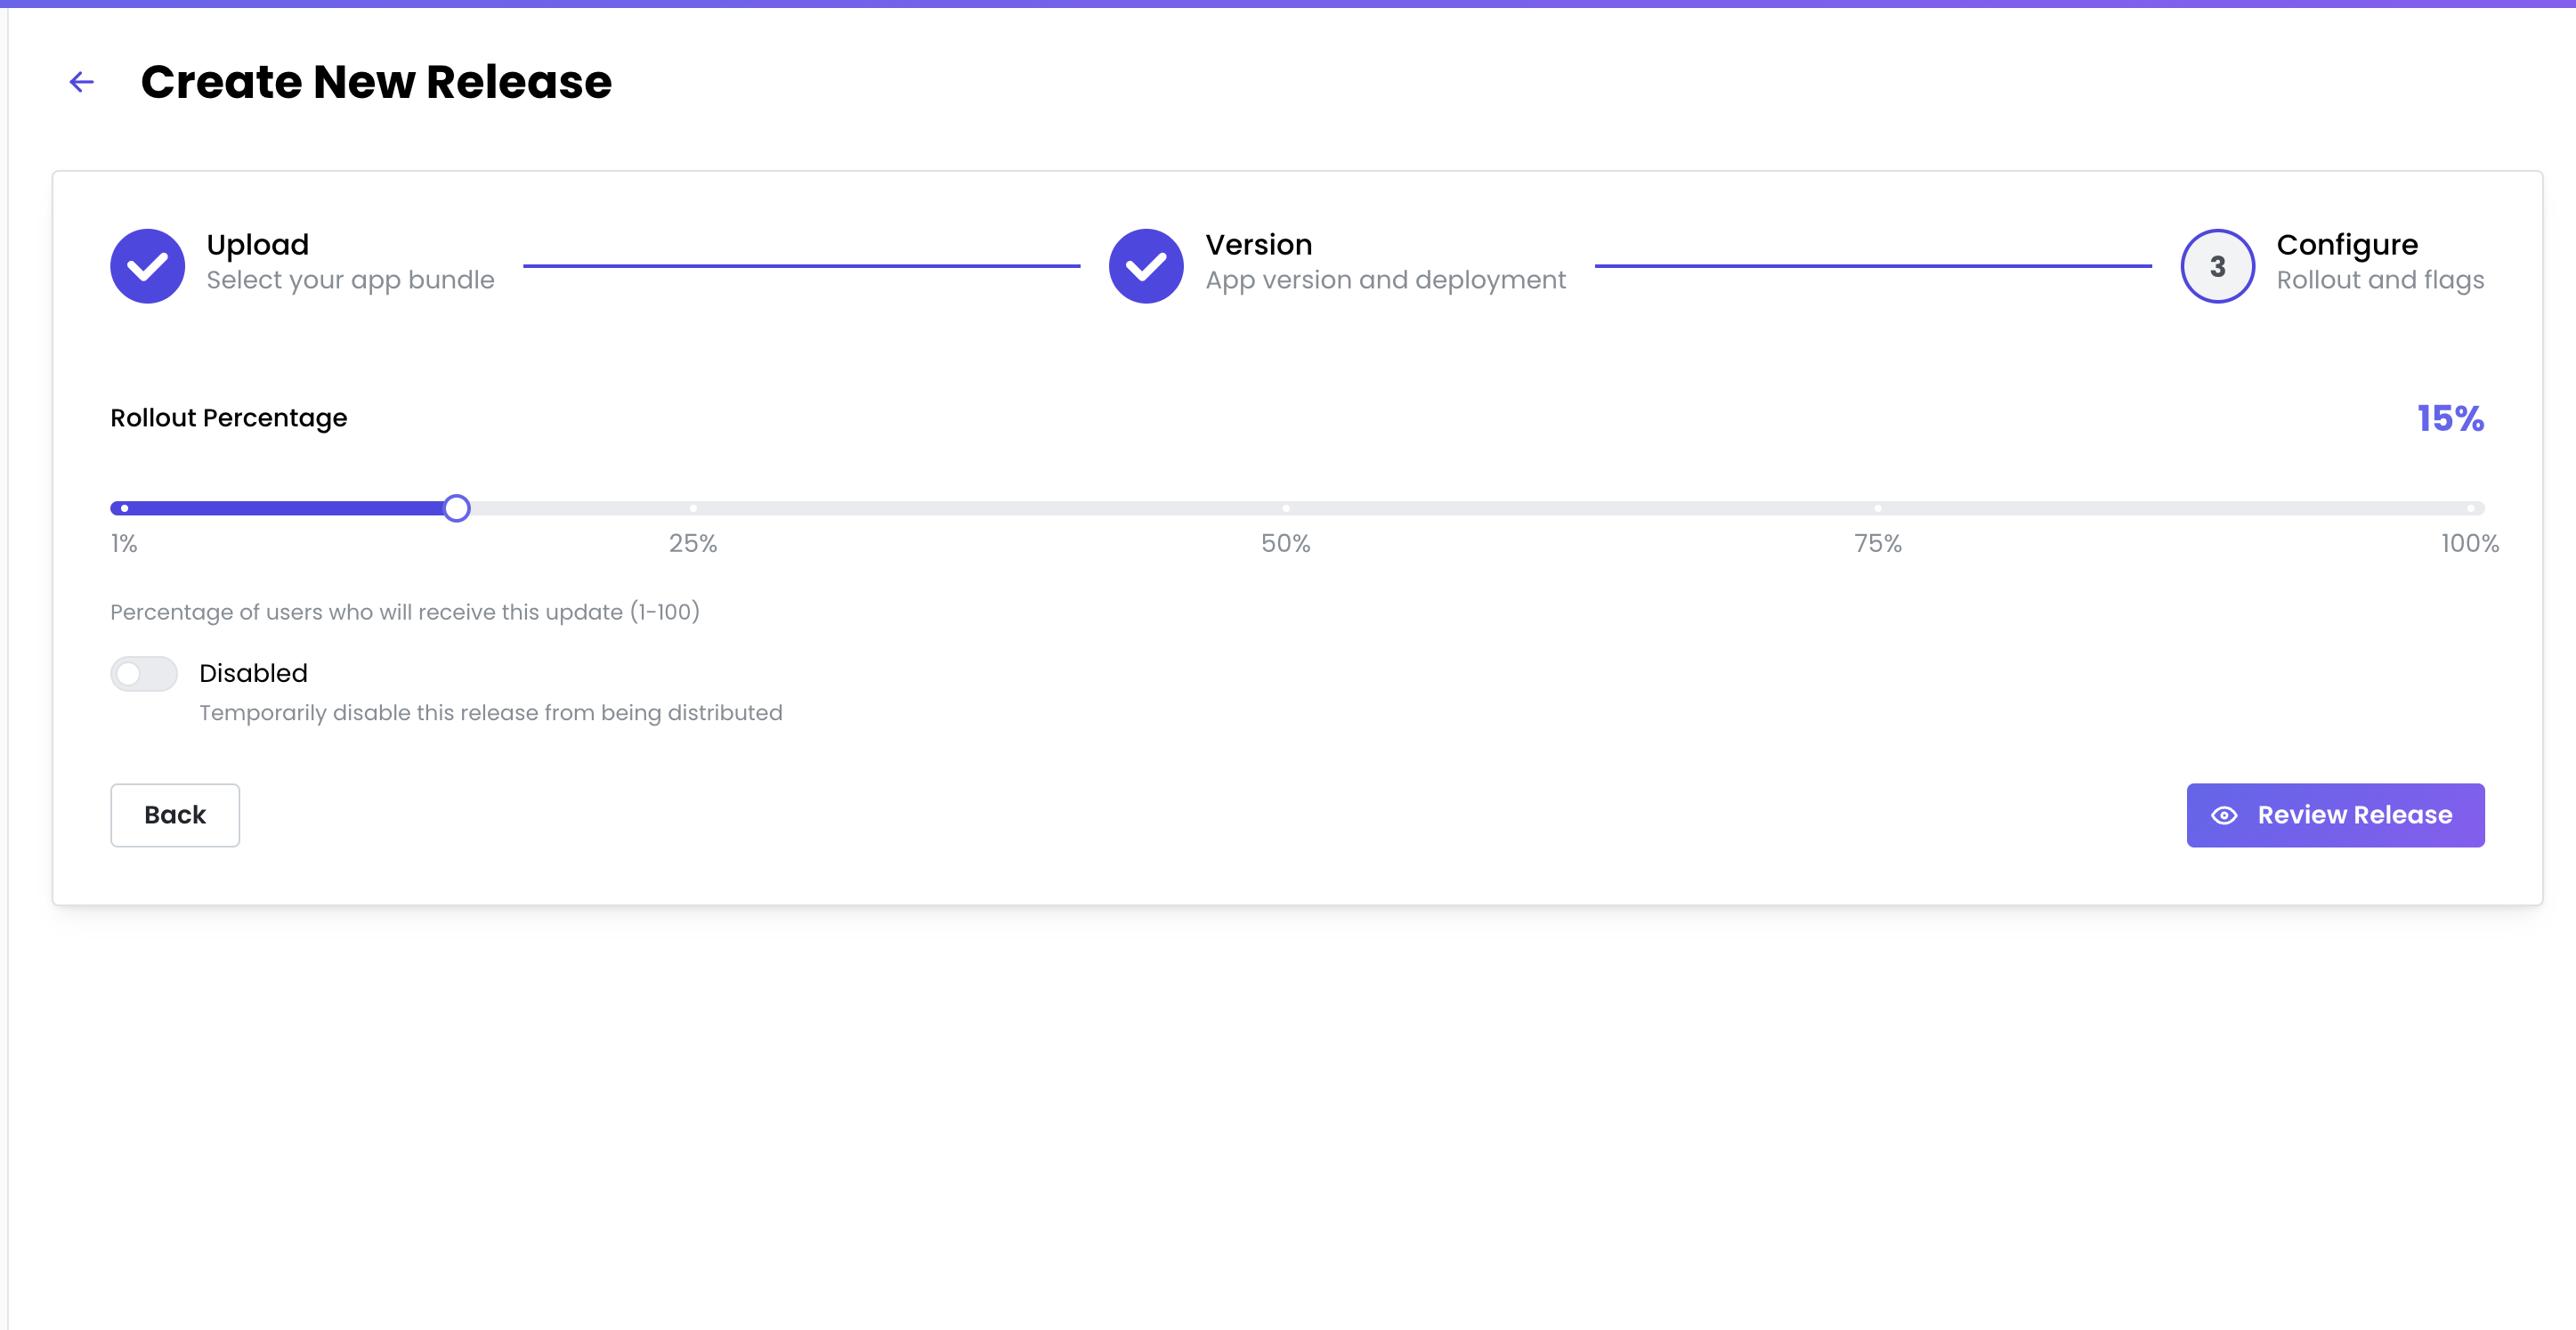
Rollout and Flags
- Review changes – verify summary and confirm
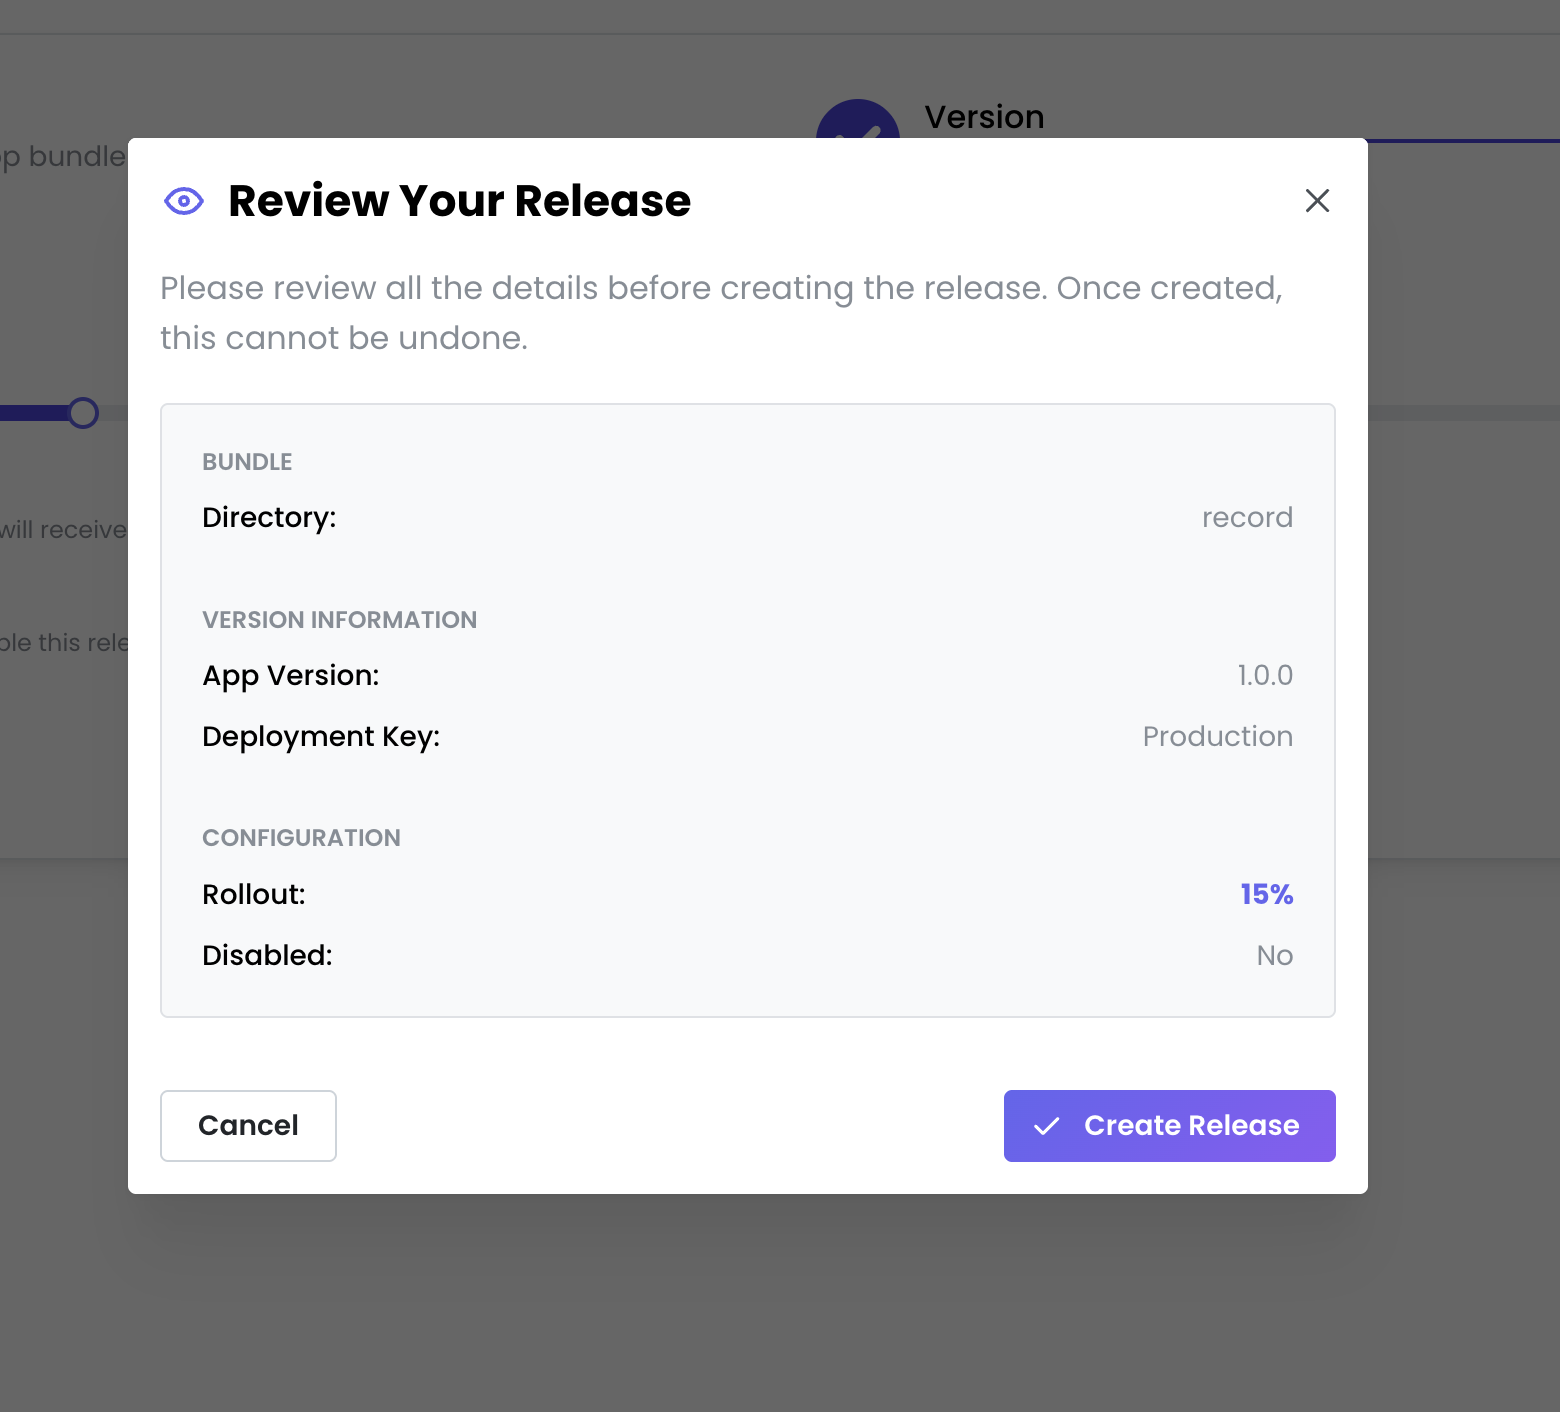
Review Changes
The dashboard shows all deployments regardless of whether they were created from the Web UI or the CLI.
Managing Multiple Deployment Keys
Use separate deployment keys to isolate testing from production traffic:
- Staging Deployment – For internal testing and QA
- Production Deployment – Live updates to end users
Each deployment key represents a different update channel for your app.
Create Your App and Generate Deployment Keys
Follow this quick flow to create an app and get deployment keys for Staging and Production.
1) Create your app
- In the Web Panel, click Create App (or New Application)
- Enter details:
- App Name:
MyApp-iOSorMyApp-Android - Platform: iOS or Android
- Description: Optional
- App Name:
2) Get your deployment keys
- After creation, two keys are generated:
- 🟡 Staging – For internal testing and QA
- 🟢 Production – Live updates to end users
3) Copy and store securely
- Copy both keys; you’ll need them in your mobile app and for releases.
Keep these keys secure. They are embedded in your app and control where updates are delivered.
Common Questions
Q: What are deployment keys?
A: Secure tokens that identify where OTA updates should be delivered. Generate them in the dashboard, embed them in your app, and use them to target deployments.
Q: Do I need to update the app store every time?
A: No. Once your app is in the store with the SDK and deployment keys, you can send JavaScript/asset updates without store approval.
Q: Can I deploy from both dashboard and CLI?
A: Yes. The dashboard shows all deployments whether they came from the Web UI or the CLI.
Q: How do I rollback an update?
A: Deploy a previous working version using the same deployment key. Users will receive it like any other update.